This document covers the installation and use both of the HTML and PHP versions of this application and reveals answers to common problems and issues - I encourage you to read this document thoroughly if you are experiencing any difficulties.
When your users load a page, retina.js checks each image on the page to see if there is a high-resolution version of that image on your server. If a high-resolution variant exists, the script will swap in that image in-place.
The script assumes you use Apple's prescribed high-resolution modifier (@2x) to denote high-resolution image variants on your server.
For example, if you have an image on your page that looks like this:
<img src="/assets/img/logo.png" />
The script will check your server to see if an alternative image exists at this path:
"/assets/img/logo@2x.png"
For Retina support it's recommended to use a double-sized image (with @2x at the end of file name) in the same folder with the normal size image.
Include your img on page and point to normal sized image (without @2x) like:
<img src="/assets/img/logo.png" />
Firstly, unzip the downloaded file to a directory on your computer. It contains a folder named lemonado. You will find the HTML and PHP folders inside it. Choose the version you want to install (PHP or HTML) and upload the folder contents via ftp to any directory on your server. Lemonado supports installation in root folder, into any sub-directory on your server or in sub-domain.
Comparison table of the HTML and PHP versions
| HTML Version | PHP Version | |
|---|---|---|
| Works on any host |
|
|
| Unlimited Color Schemes |
|
|
| Unlimited Pages |
|
|
| Valid HTML5 |
|
|
| New Items Bubble Counter |
|
|
| Custom Error Pages |
|
|
| Compatibility With jQuery Mobile Widgets |
|
|
| HiDPI (Retina ©) Images Ready |
|
|
| Disqus © Comments System |
|
|
| Contact Forms |
|
|
| Custom Admin Page With Options Panel |
|
|
| Settings Storage |
|
|
| Connecting WordPress-based blog |
|
|
Once you uploaded all files to your server, you need to activate Apache's custom error pages handler and deny access to the settings.xml and config.php file. This is an optional step, but it's highly recommended.
Rename the .htaccess.txt file in root to .htaccess
Info. For IIS.Add to the IIS's web.config file the code provided inweb.config file
The files contain paths to the custom error pages such as 404.php.
If you installed your application into a sub-folder you must to define right paths to the error pages in the .htaccess or web.config file. For example: your application is installed into the lemonado sub-folder and available at http://yourdomain.com/lemonado. Your .htaccess file would be like that:
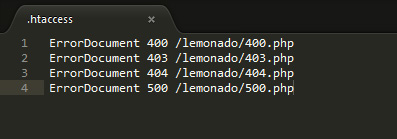
Note: This way you can define additional pages for any server errors. For example, you can create a new 401.php (401.html) file and define it in the .htaccess (web.config) file. You can find the full list of of HTTP status codes here.
Info. For PHP version only. Go to the /lib folder and rename the .htaccess.txt file to .htaccess
This file will block access to your settings.xml from world.
Important! It's strongly recommended to remove read permissions (x00 value) from the lib/settings.xml and config.php files to prevent them from reading/stealing.
config.php file. This is a main file. It defines the absolute and relative paths to the files and reads the settings.xml file with settings.
4xx.php or 5xx.php files. These files are templates for web server's errors.
index.php. This is a Home Page of your web application.
/assets folder. This folder contents styles, images and scripts.
/lib/settings.xml file. This file contains all settings for your application.
/templates folder. This folder contains the header, footer and panels templates for all pages.
/web.config file. This file contains the Microsoft IIS error pages handler code.
/.htaccess file. This file contains the Apache Web Server error pages handler code.
4xx.html or 5xx.html files. These files are templates for web server's errors.
index.html. This is a Home Page of your web application.
/assets folder. This folder contents styles, images and scripts.
/web.config file. This file contains the Microsoft IIS error pages handler code.
/.htaccess file. This file contains the Apache Web Server error pages handler code.
Lemonado is based on the newest jQuery Mobile 1.4.x framework and absolutely compatible with it. This means that you are able to use any jQuery Mobile's Widgets on any page from this widget reference page. Please read this reference accurately before edit any page. Jquery Mobile and Lemonado provide wide range of widgets on any taste, from pretty pop-ups to nice dialogs, from custom form inputs to beautiful list styles. All widgets are flexible and has many settings.
Define your site color, Disqus shortname (see Comments tab), your email, address, etc. to make your site ready.
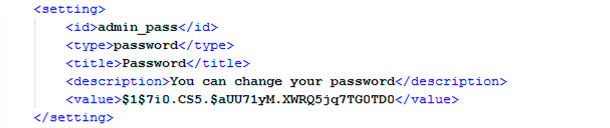
Note: Password is stored in XML file in encrypted mode. For safety purposes once encrypted it can't be decrypted. If you lost your password the only way to reset it is edit XML file.
To reset password to admin you have to:
Open the settings.xml file in your favorite editor. You can find it in the /lib folder.
Find the first ‹setting› node
To set up new page you need to create new template file or edit existing template file. There is a default.php/default.html file you can use as the reference for new pages. There are more than 20 page templates included already.
For example to edit Home Page you just need to edit the index.php/index.html file.
All Lemonado pages has similar structure:
<!DOCTYPE html>
	<html>
	<head><meta charset="UTF-8">
		<title>Your Title Here</title>
	<?php require_once ('config.php'); ?>
	<?php include (ROOT_DIR.'/templates/header.php'); ?>
	<div data-role="page">
		<?php include (ROOT_DIR.'/templates/panel-left.php'); ?>
		<?php include (ROOT_DIR.'/templates/panel-right.php'); ?>
		<div id="header" data-role="header" data-position="fixed" data-theme="c">
			Header Content (Do not forget to change your title here)
		</div><!-- /header -->
		<div data-role="content">
			<div class="container">
				Page Content Goes Here
			</div>
	<?php include (ROOT_DIR.'/templates/footer.php'); ?>
Lemonado uses PHP variables to define the relative and absolute paths to the files and URLs. Use the ROOT_DIR variable when including files. For example:
<?php include (ROOT_DIR.'/templates/header.php'); ?>
And use the ROOT_URL variable for URLs. For example:
<img src="<?php echo ROOT_URL; ?>/assets/img/logo.png" alt="Logo">
Note: Include your custom files after the config.php file. In other words the config.php must be the first in a sequence
Slider mark-up has the following code:
<div class="owl-carousel">
	<div class="item">
		<img src="" alt="">
	</div>
	<div class="item">
		...
	</div>
	<div class="item">
		...
	</div>
</div>
Slider can be inserted into any page, not only home page. You need to add the owl-carousel class to a div and append img tags to a divs with item class. That all.
Note: Do not include more than one slider per page. It may cause page errors or make slider do not workable.
Advertisement mark-up has the following code:
<div class="advertisement-468-60">
	<img src="..." alt="Advertisement">
</div>
Advertisement can be inserted into any page, unlimited times.
Lemonado supports static Google Maps. Here is a code that takes an address value, zoom value, map type and marker from settings storage:
<div class="map"> <img src="https://maps.googleapis.com/maps/api/staticmap?center=<?php echo rawurlencode($map_address); ?>&maptype=<?php echo $map_type; ?>&zoom=<?php echo $map_zoom; ?>&size=468x350&markers=<?php echo rawurlencode($map_address); ?>&sensor=false" width="468" height="350" alt="Google Map"> </div>
See the information.php for the reference.
For more information how to use Google Static Maps visit Static Maps API V2 Developer Guide.
Lemonado uses Disqus comments system. It's a 3rd-party comments system. Before you can use and moderate comments on pages, you must sign up on Disqus.
To install Disqus, you will need to know your site shortname as registered on Disqus. You can find it in your settings panel on disqus.com

The easiest way to set your site shortname is to do it via admin settings panel (see Setting up pages tab). You will find the "Disqus Shortname" field there.
Another way is edit the templates/header.php file. Find the following line and paste your value:
var disqus_shortname = 'YOUR_VALUE'; // Required - Replace YOUR_VALUE with your site shortname
Set up finished!
To set your site shortname in HTML version you need to edit assets/js/custom.js. Find and edit the following line (line №253):
var disqus_shortname = 'lemonado'; // Required - Replace lemonado with your forum shortname
Set up finished!
Paste the following code on page where you want to comments show:
<div class="disqus-wrap disqus-inactive"></div>
<noscript>Please enable JavaScript to view the <a href="http://disqus.com/?ref_noscript">comments powered by Disqus.</a></noscript>
<a href="http://disqus.com" class="dsq-brlink">comments powered by <span class="logo-disqus">Disqus</span></a>
Note: Do not include more than one comments section per page. It may cause page errors or make comments do not workable.
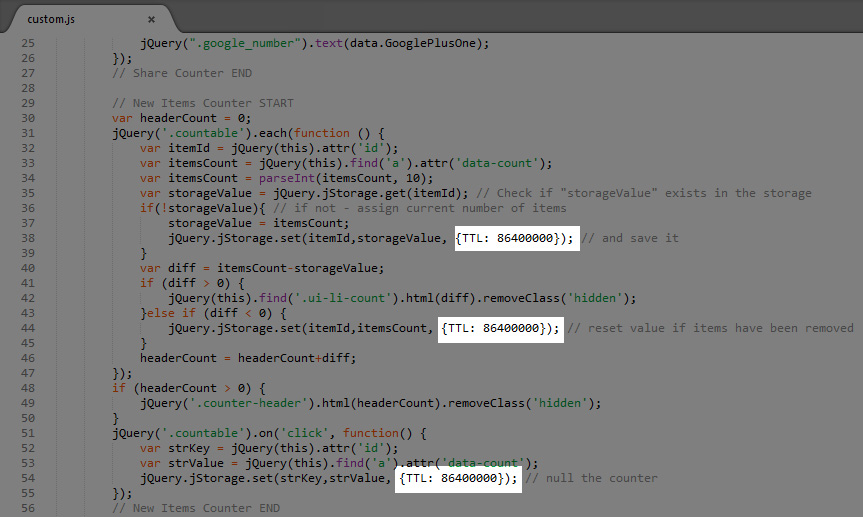
Every time you are adding new post, article, news etc. you can inform your guests about it. When a user visited the site for the first time, the information about current number of articles is stored in his browser. This information is unique per user. User will not see any counters until you add a new article. Storage time-to-live is limited and expires after 10 days.
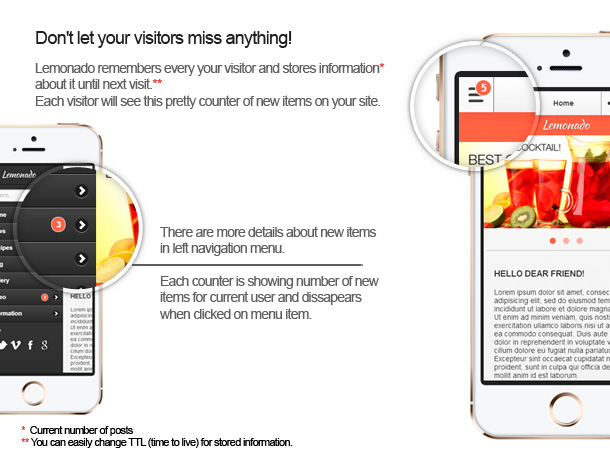
Note: Counters are available for top-level menus only. Adding counter to a sub-menu may cause errors.
Open the templates/panel-left.php file in your favorite editor.
Add the countable class and ID to a menu list item you want to track. Example:
<li id="your_id_here" class="countable">...</li>
Add the data-count attribute to a link. Example:
<li id="menu_news" class="countable">
	<a data-count="3" href="...">Menu Item Name</a>
</li>
Change the data-count value to a value that represents the current number of items on page you are tracking. Do it every time you are adding new items on the page.
Add the countable class and ID on every page of your application to a menu list item you want to track. Menu list is an ul wrapped in the div with left_panel ID. Example:
<li id="your_id_here" class="countable">...</li>
Add the data-count attribute to a link. Example:
<li id="menu_news" class="countable">
	<a data-count="3" href="...">Menu Item Name</a>
</li>
Change the data-count value to a value that represents the current number of items on page you are tracking. Do it every time you are adding new items on the page.
Do you have a WordPress-based site/blog? Lemonado can be connected to any WordPress installation! Put your copy of the Lemonado on any folder on a server where your WordPress is installed, define path to the wp-load.php file and...done! For the reference see the wp-posts.php file. In this file you will see how I defined path to my own WordPress blog.
Now you can use the whole power of your Wordpress blog! You can run fully-functional WordPress' Loop, change posts structure/layout and much more. The standard loop example you can see in the wp-posts.php file, but you can change a WordPress' query to output custom category, posts, taxonomy, et cetera! For the manual/examples see The Loop and WP_Query documentation.
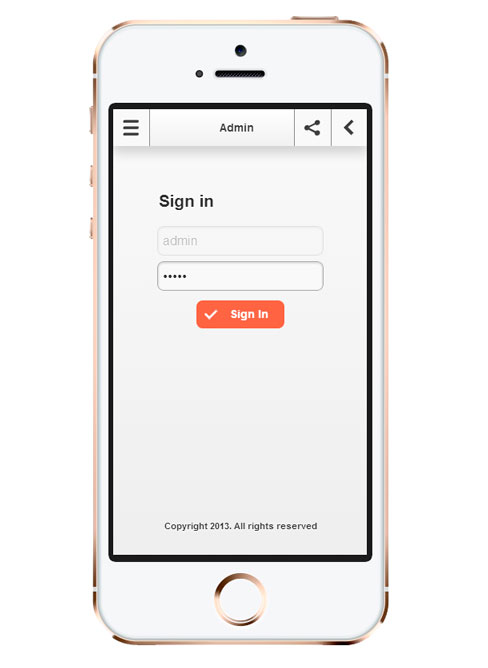
Lemonado has the optional panel with settings stored in XML file.
Here is a list of currently supported options:
If you want resell the web application or just make it more comfortable you are able to add new options easily.
To add a new option you have to:
<setting>
	<id>...</id>
	<type>...</type>
	<title>...</title>
	<description>...</description>
	<value>...</value>
</setting>
Note: Some options like select, switch, radio, checkbox and range are require additional nodes. You must define them. Look the settings.xml for the reference.
To group fields into collapsible section you can use Collapsible type of option. Put all required
<setting>
	<type>collapsible-start</type>
	<title>General Settings</title>
	<value>...</value>
</setting>
...
<setting>
	<type>collapsible-end</type>
	<title>General Settings</title>
	<value>...</value>
</setting>
This code will group all fields between the nodes into the collapsible field with "General Settings" title.
How to output saved settings from the XML file to your page? Lemonado creates PHP variable name like according ID node in XML. For example, you have the following piece of code in your XML:
<setting>
	<id>heading_color</id>
	<type>color</type>
	<title>Choose colour for headings</title>
	<description>...</description>
	<value>#000000</value>
</setting>
Paste this code to your page where you want to output color value...
<?php echo $heading_color; ?>
...and you will see #000000 on the page.
As you can see we used the heading_color ID value from the XML as PHP variable. For more examples and reference see the settings-output.php file.


